

Watch the Demo Video first!
System Check Steps & Purpose of System Check:
In the following steps we will demonstrate how to navigate the SIM interface via the System Check Exercise Steps. The System Check is composed of sample cases that you can use to familiarize yourself with the testing environment in advance of the actual SIM.
Please note that the SIM workstation setup should be completed in advance of the System Check exercise. If the system has not been setup, please contact your Program Coordinator and IT Group.
Purpose of System Check:
- To make sure you know your WIDI username and password.
- To ensure the Visage image viewer has been installed correctly.
Step 1: Logging Into SIM Website:

Begin by opening your web browser and typing in the SIM web address: https://widionline.xray.ufl.edu/sims_site
Log in to the system using your WIDI username and password. If you don’t remember your WIDI username and/or password, please follow the “Forgot Your Password” reset prompts.
Step 2: Start Your SIM
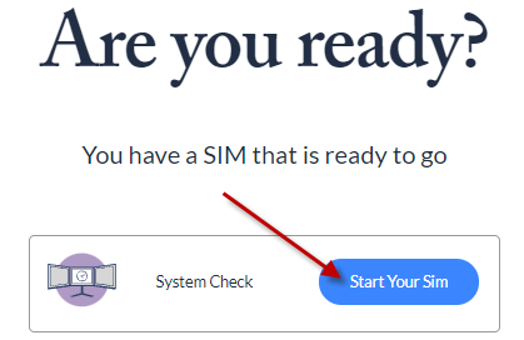
Once you have successfully logged in, begin the System Check by clicking on the blue “Start Your SIM” button.
Step 3: SIM Test Interface PopUp Instruction Page
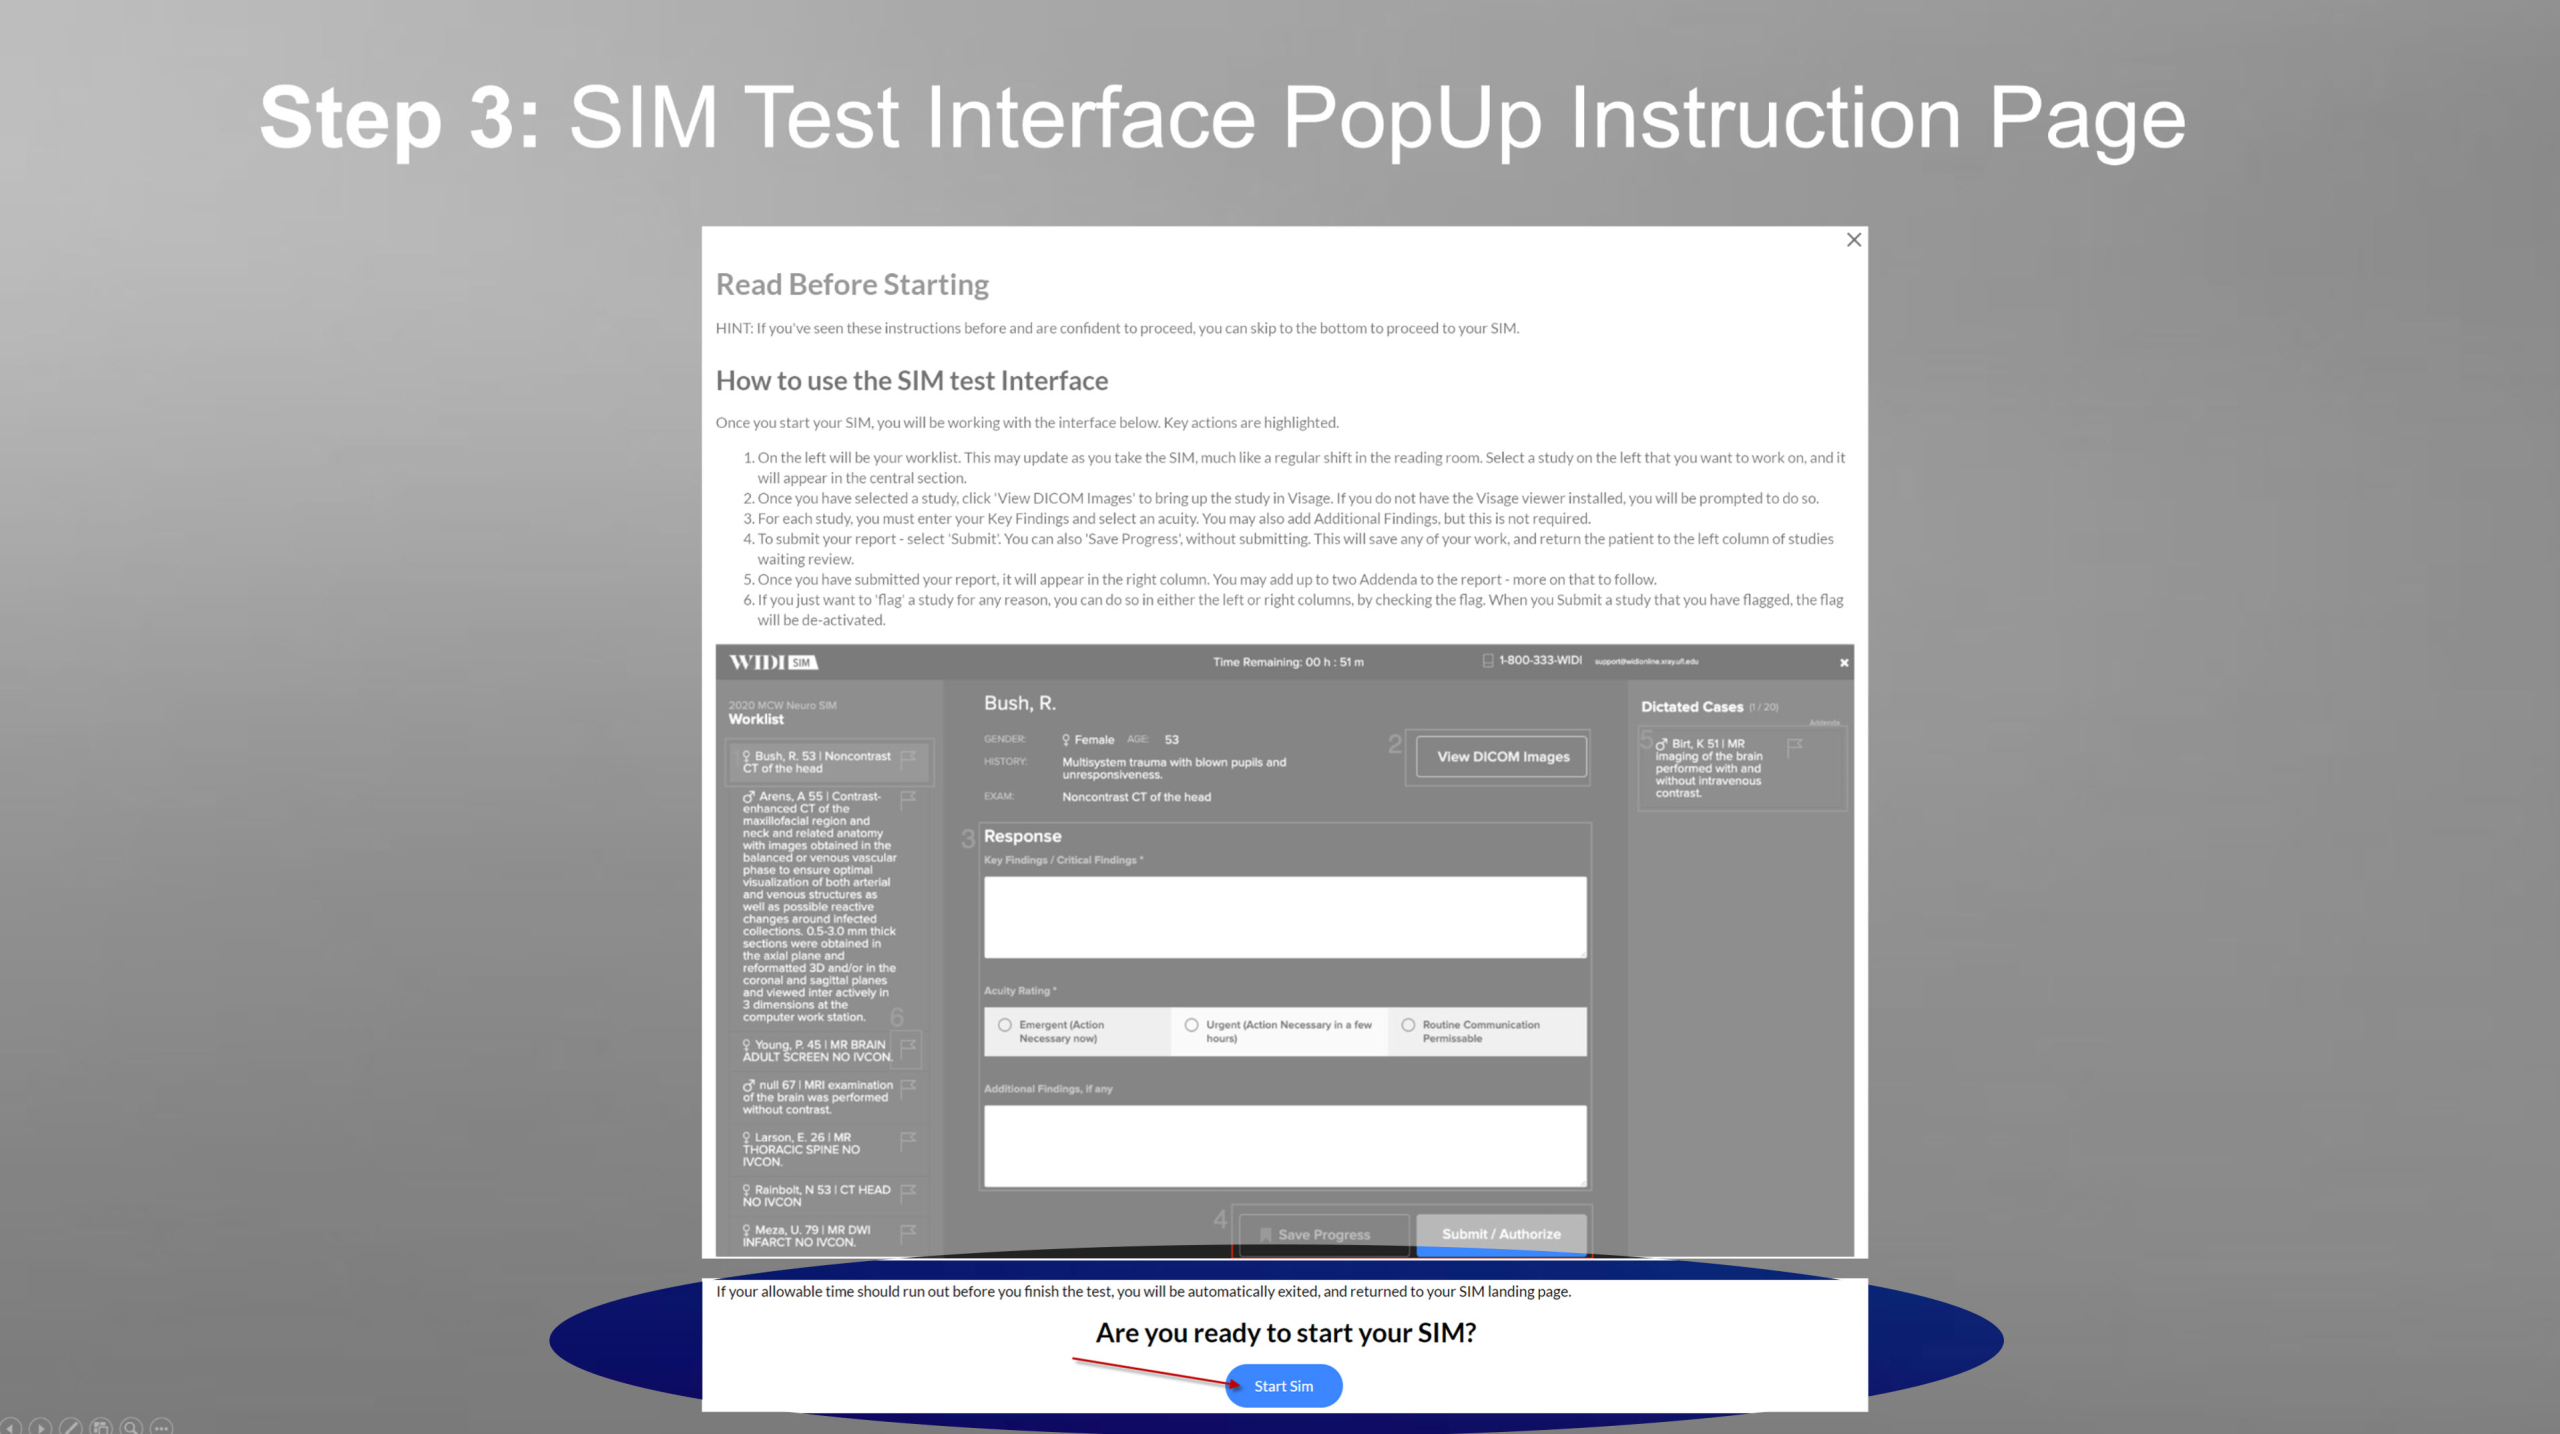
After you click on the “Start Your SIM” button, the SIM interface instructions will pop up. Please read through the instructions. When you are finished, click the “Start SIM” button at the bottom of the page.
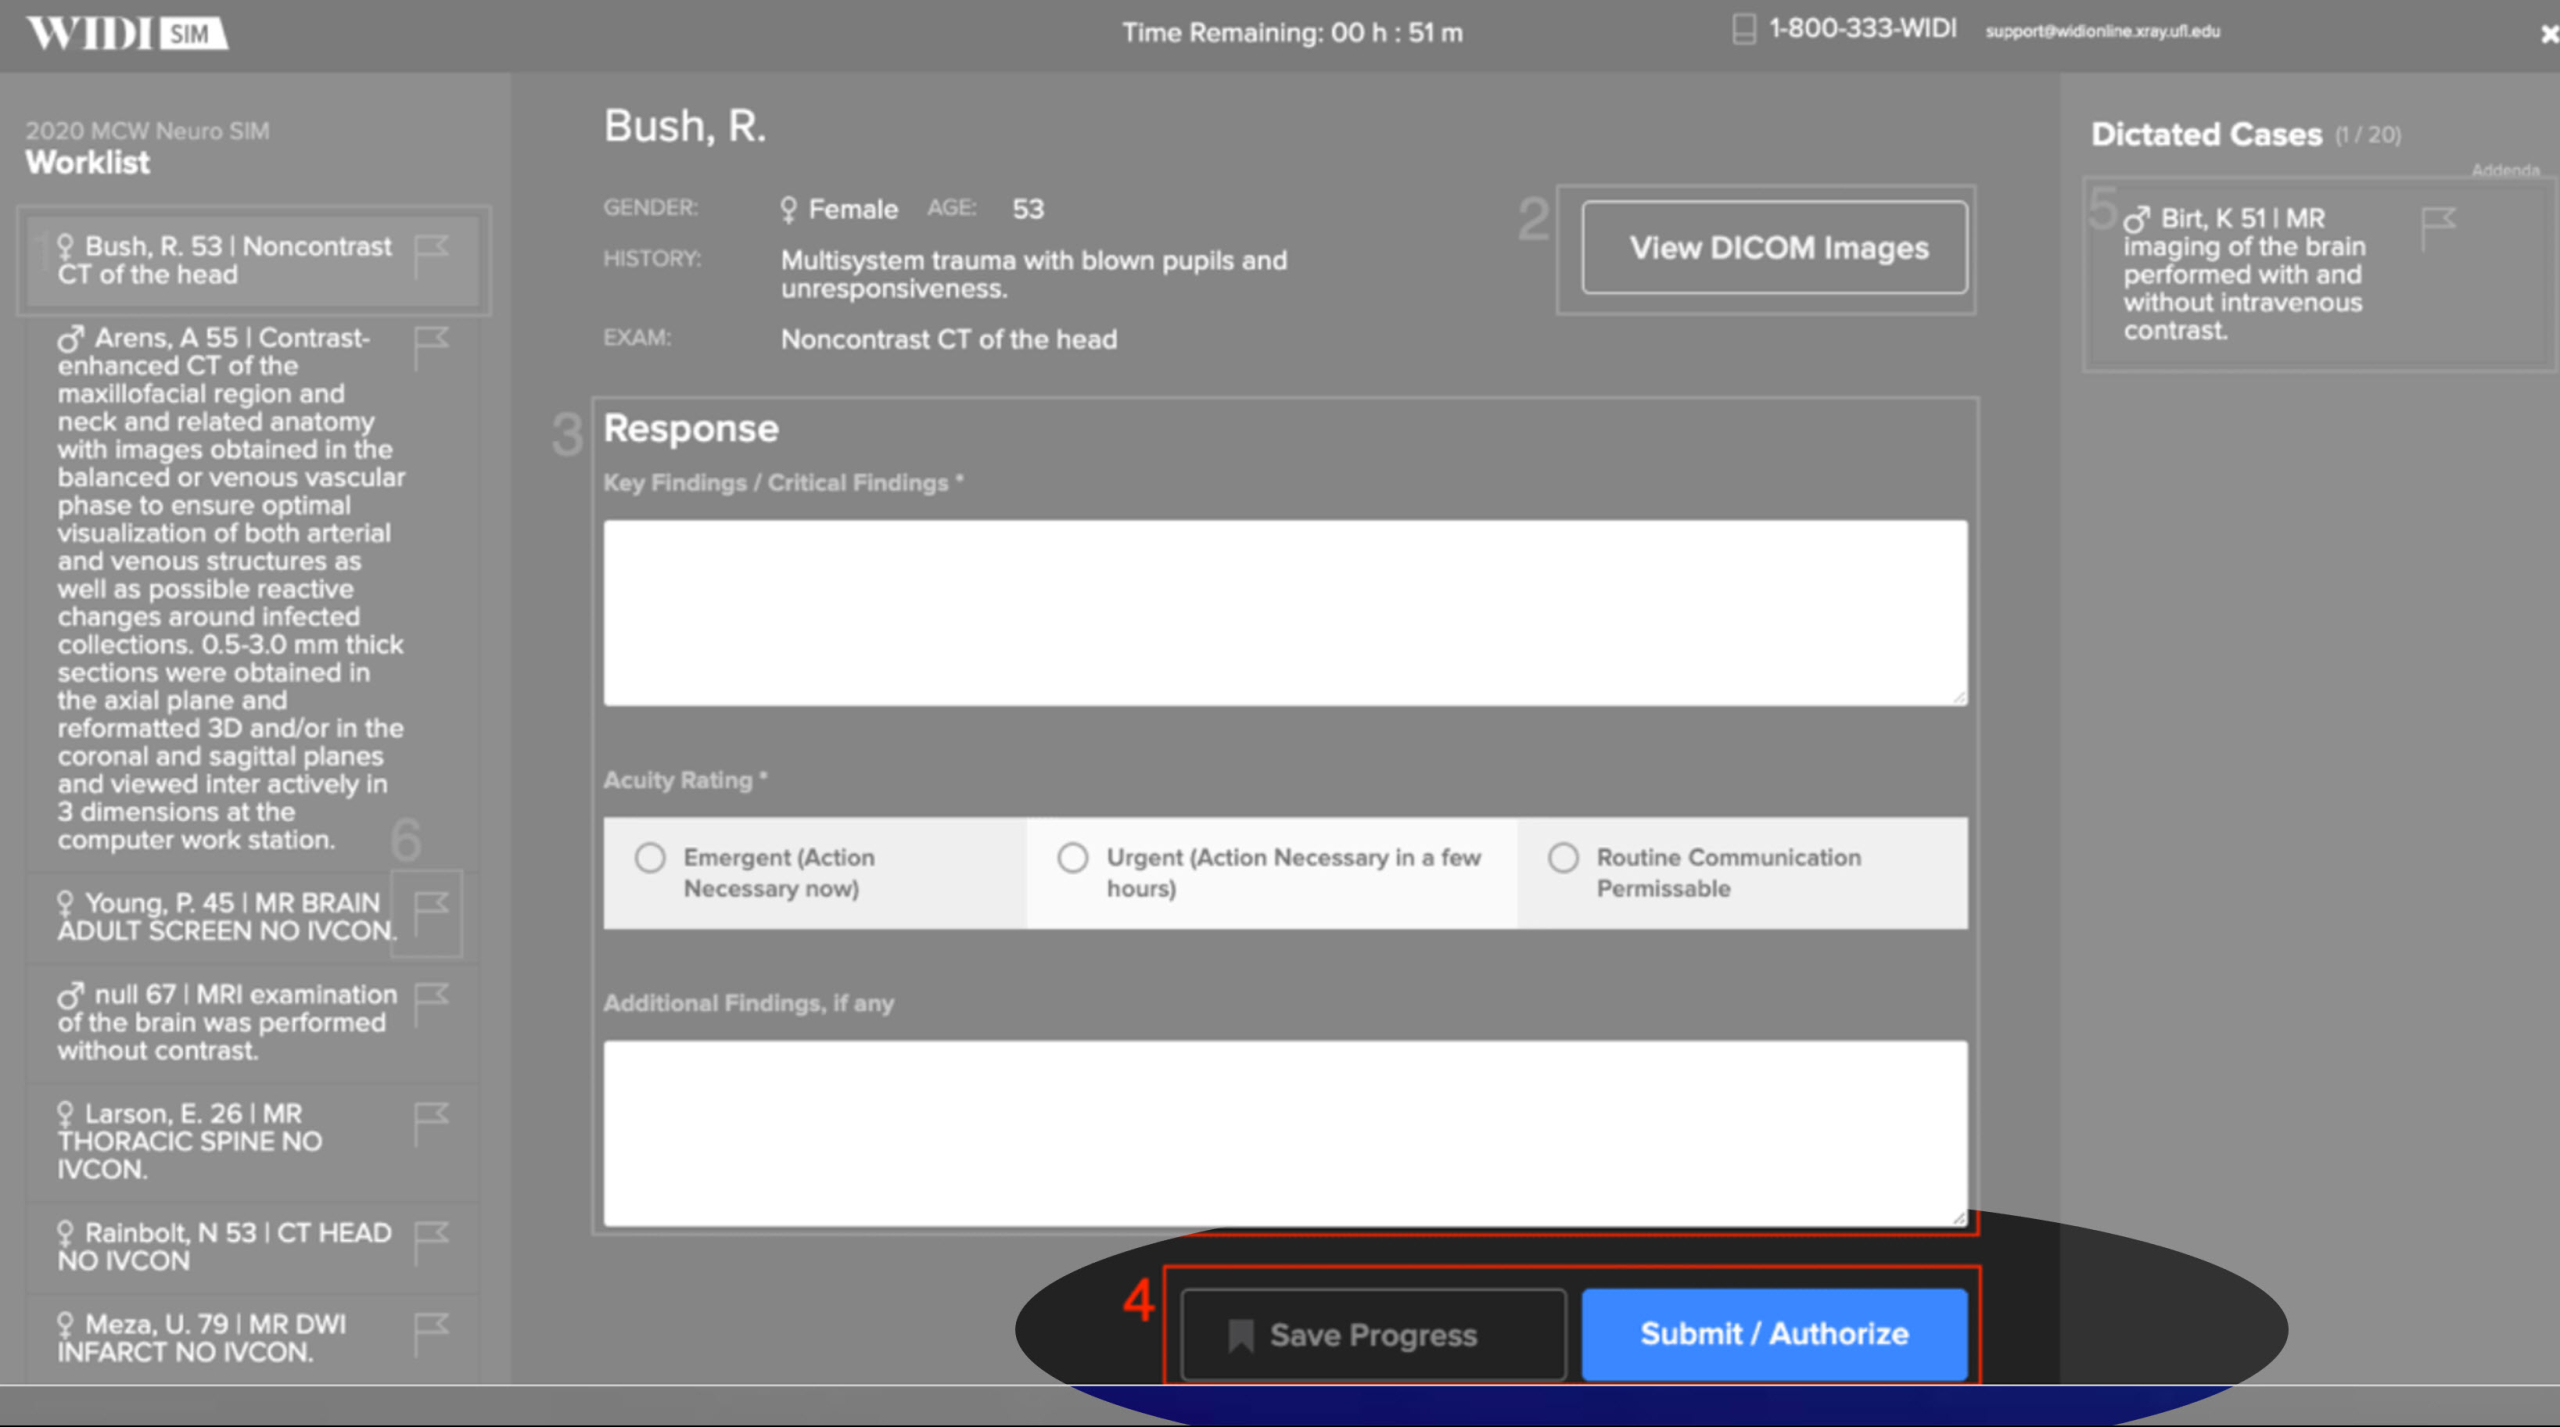
Step 4: SIM Test Reporting Interface
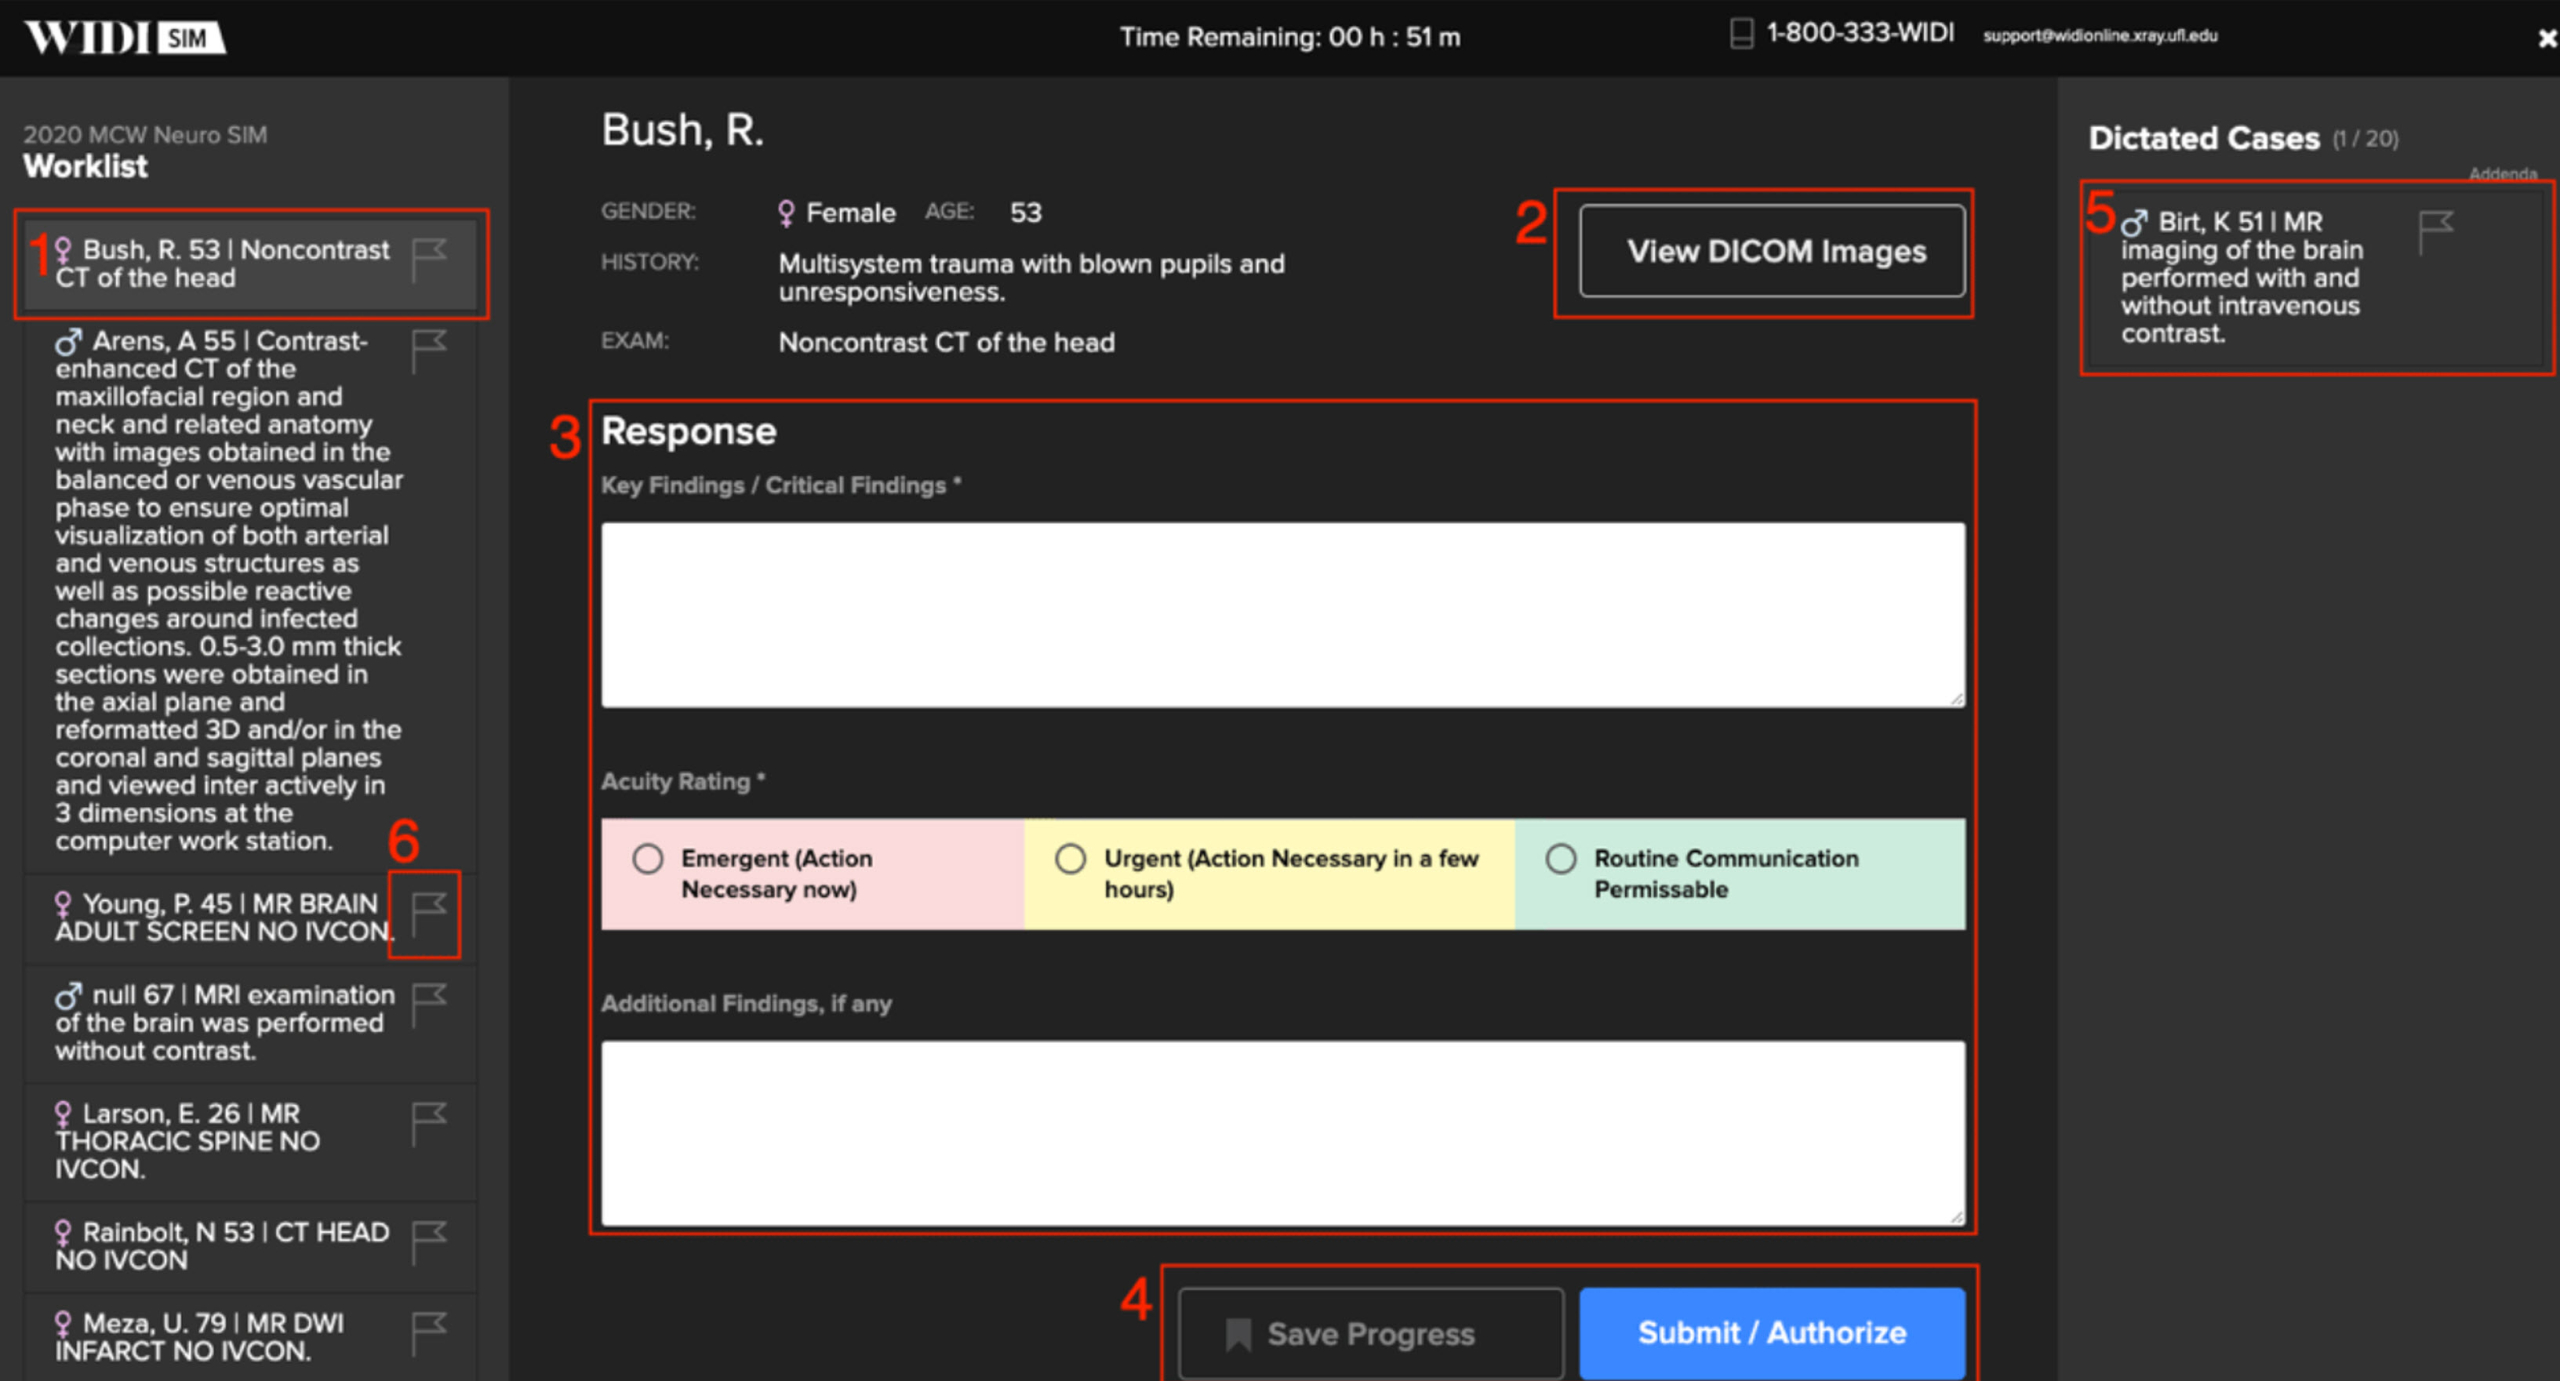
- On the left is the worklist. This will update as you take the SIM, much like a regular shift in the reading room. Select a study from the left and it will appear in the central section.
- Once you have selected a study, click “View DICOM Images” to launch the study in Visage.
- For each case you are required to enter the critical findings, an acuity rating, and any incidental findings (if applicable). When entering findings, please be short and concise – make the call. Refrain from verbose, lengthy responses.
- To submit your report, select the blue “Submit/Authorize” button. You can also “Save Progress” without submitting. This will save your work and return the patient to the left column of studies. Please note ALL CASES must be submitted by the end of the SIM in order to be graded.
- Once you have submitted your report, it will appear in the right column.
- If you wish to flag a study for any reason, you can do so in either the left or right column by clicking on the flag. When you submit a study you have flagged, the flag will be de-activated.
Step 5: How to Save & Submit the Case
If you choose to Save a study, without Submitting, click “Save Progress” and it will be returned to the left column, with a bookmark icon showing that you have already done some work on it. When you are finished with the case, click “Submit/Authorize.”
All cases must be submitted in order to be graded.
Step 6: How to Add an Addendum
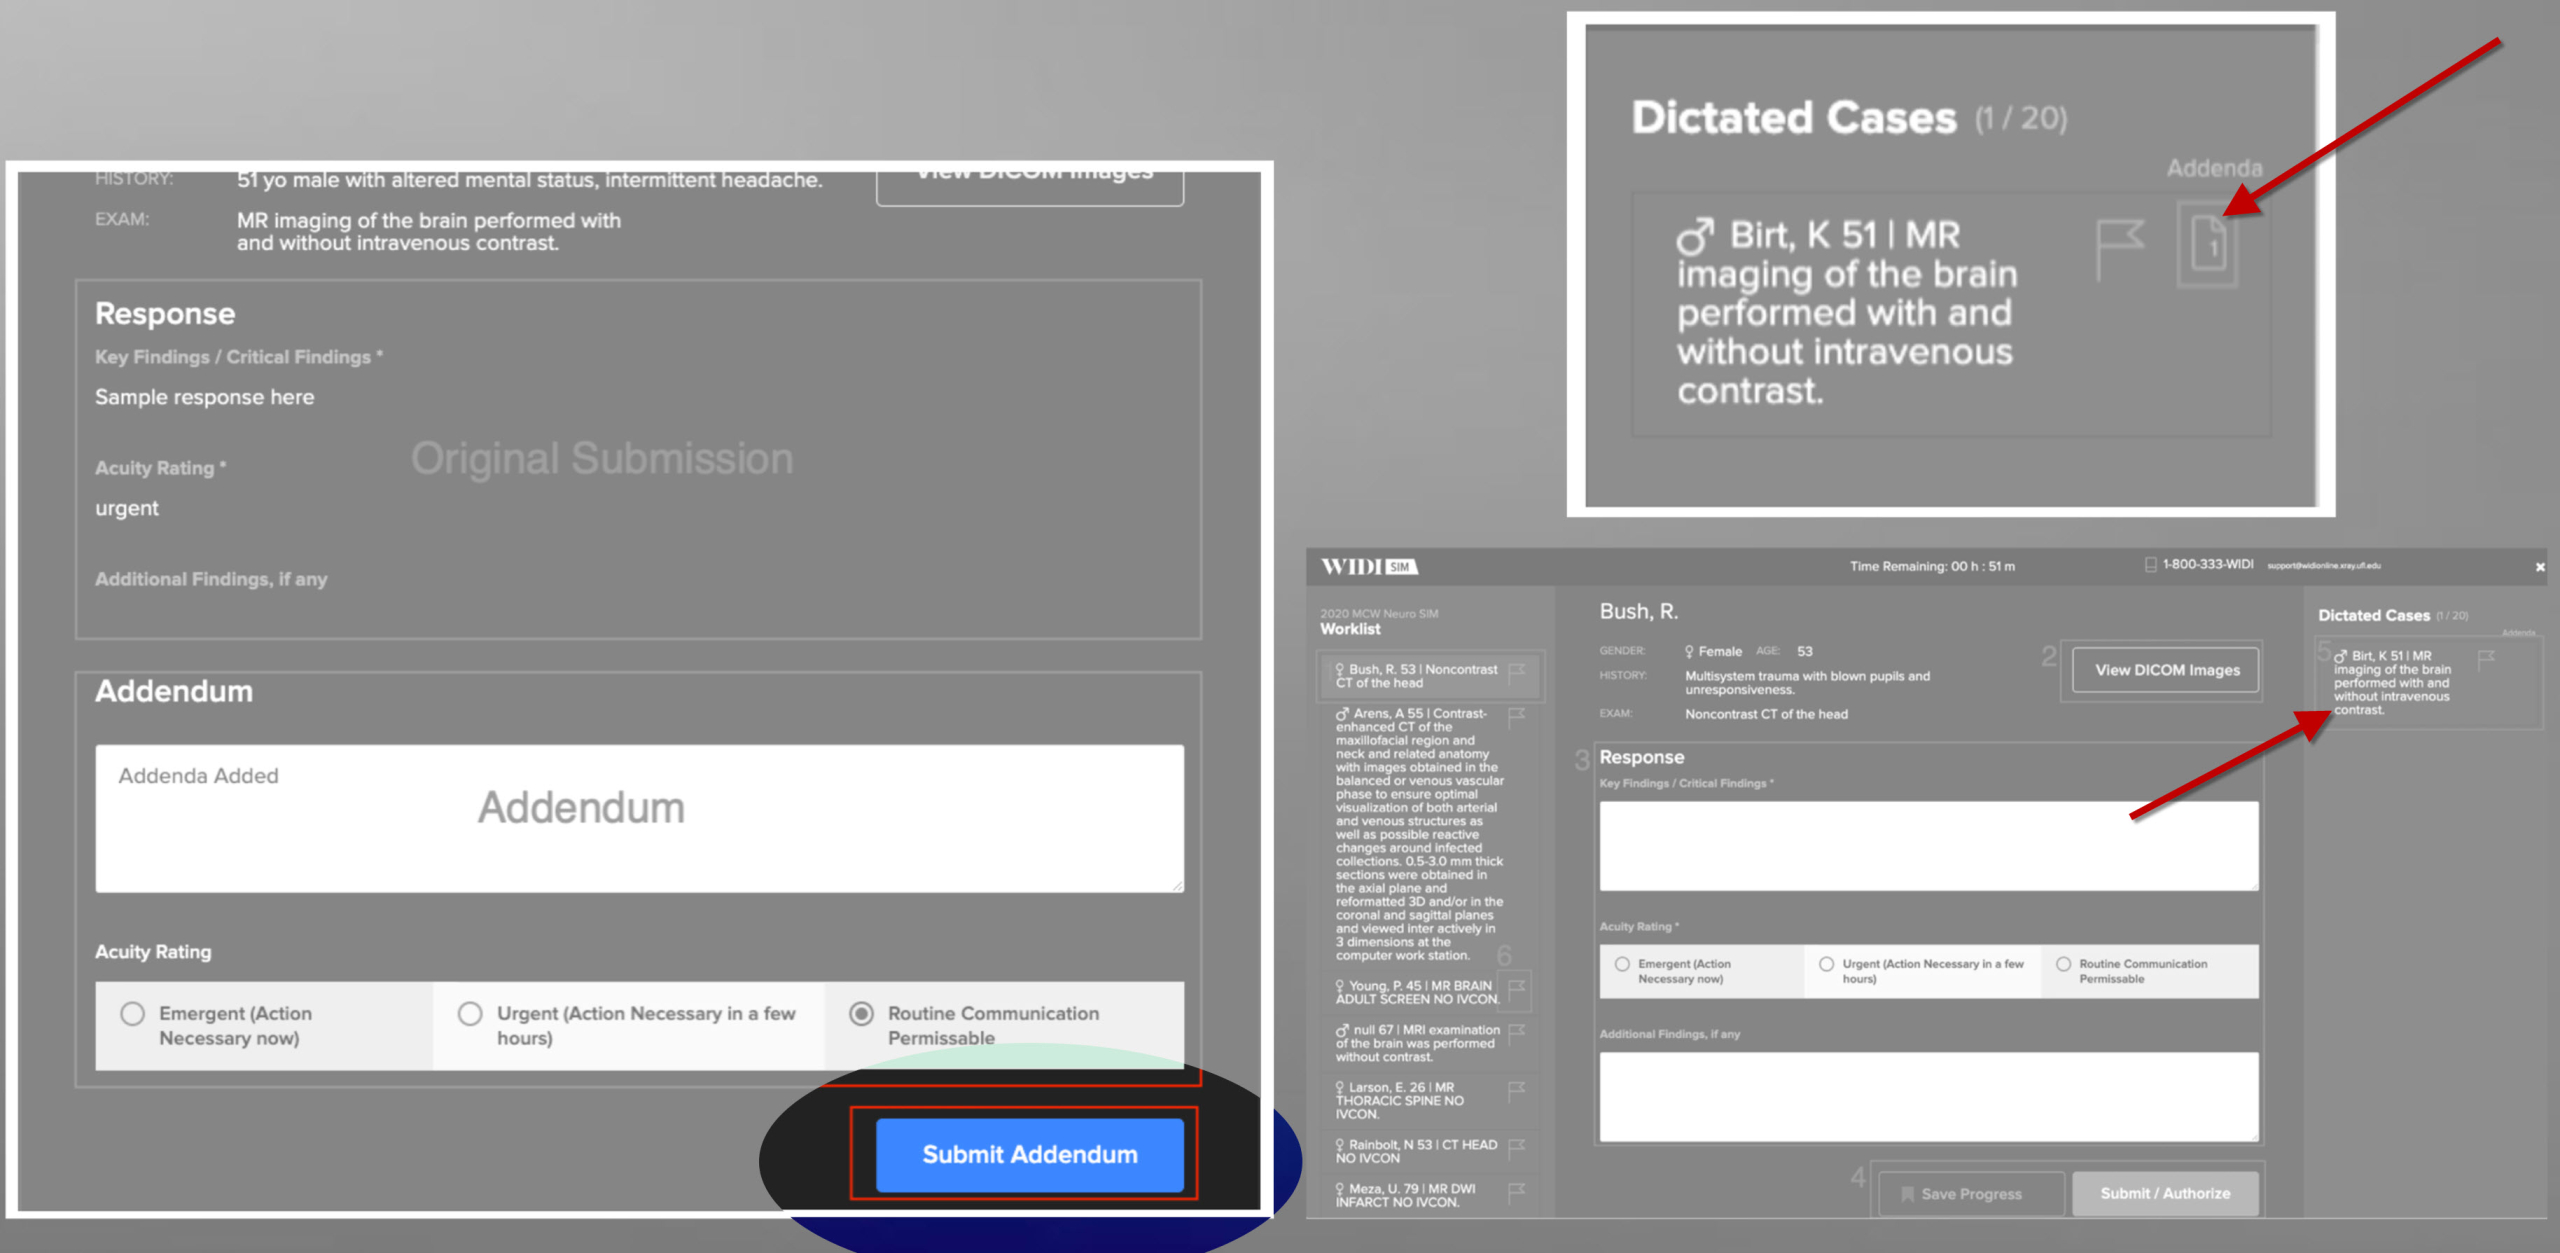
After you have Submitted a study, it is still possible to make adjustments by submitting (up to two more) addenda. Simply click the study on the right column to return it to the center column. You will then see details of your original submission, as well as space to add an addendum, and reassert the Acuity. When you are ready, submit the Addendum.
The case will return to the right, with a new icon, indicating that an Addendum has been added.
If you have already submitted two addenda, you can no longer edit or amend your report.
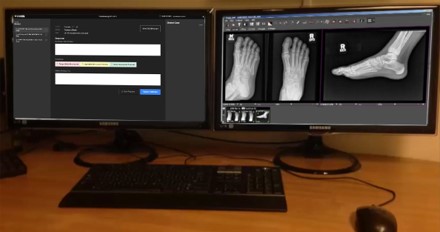
Step 7: Visage Imaging Interface
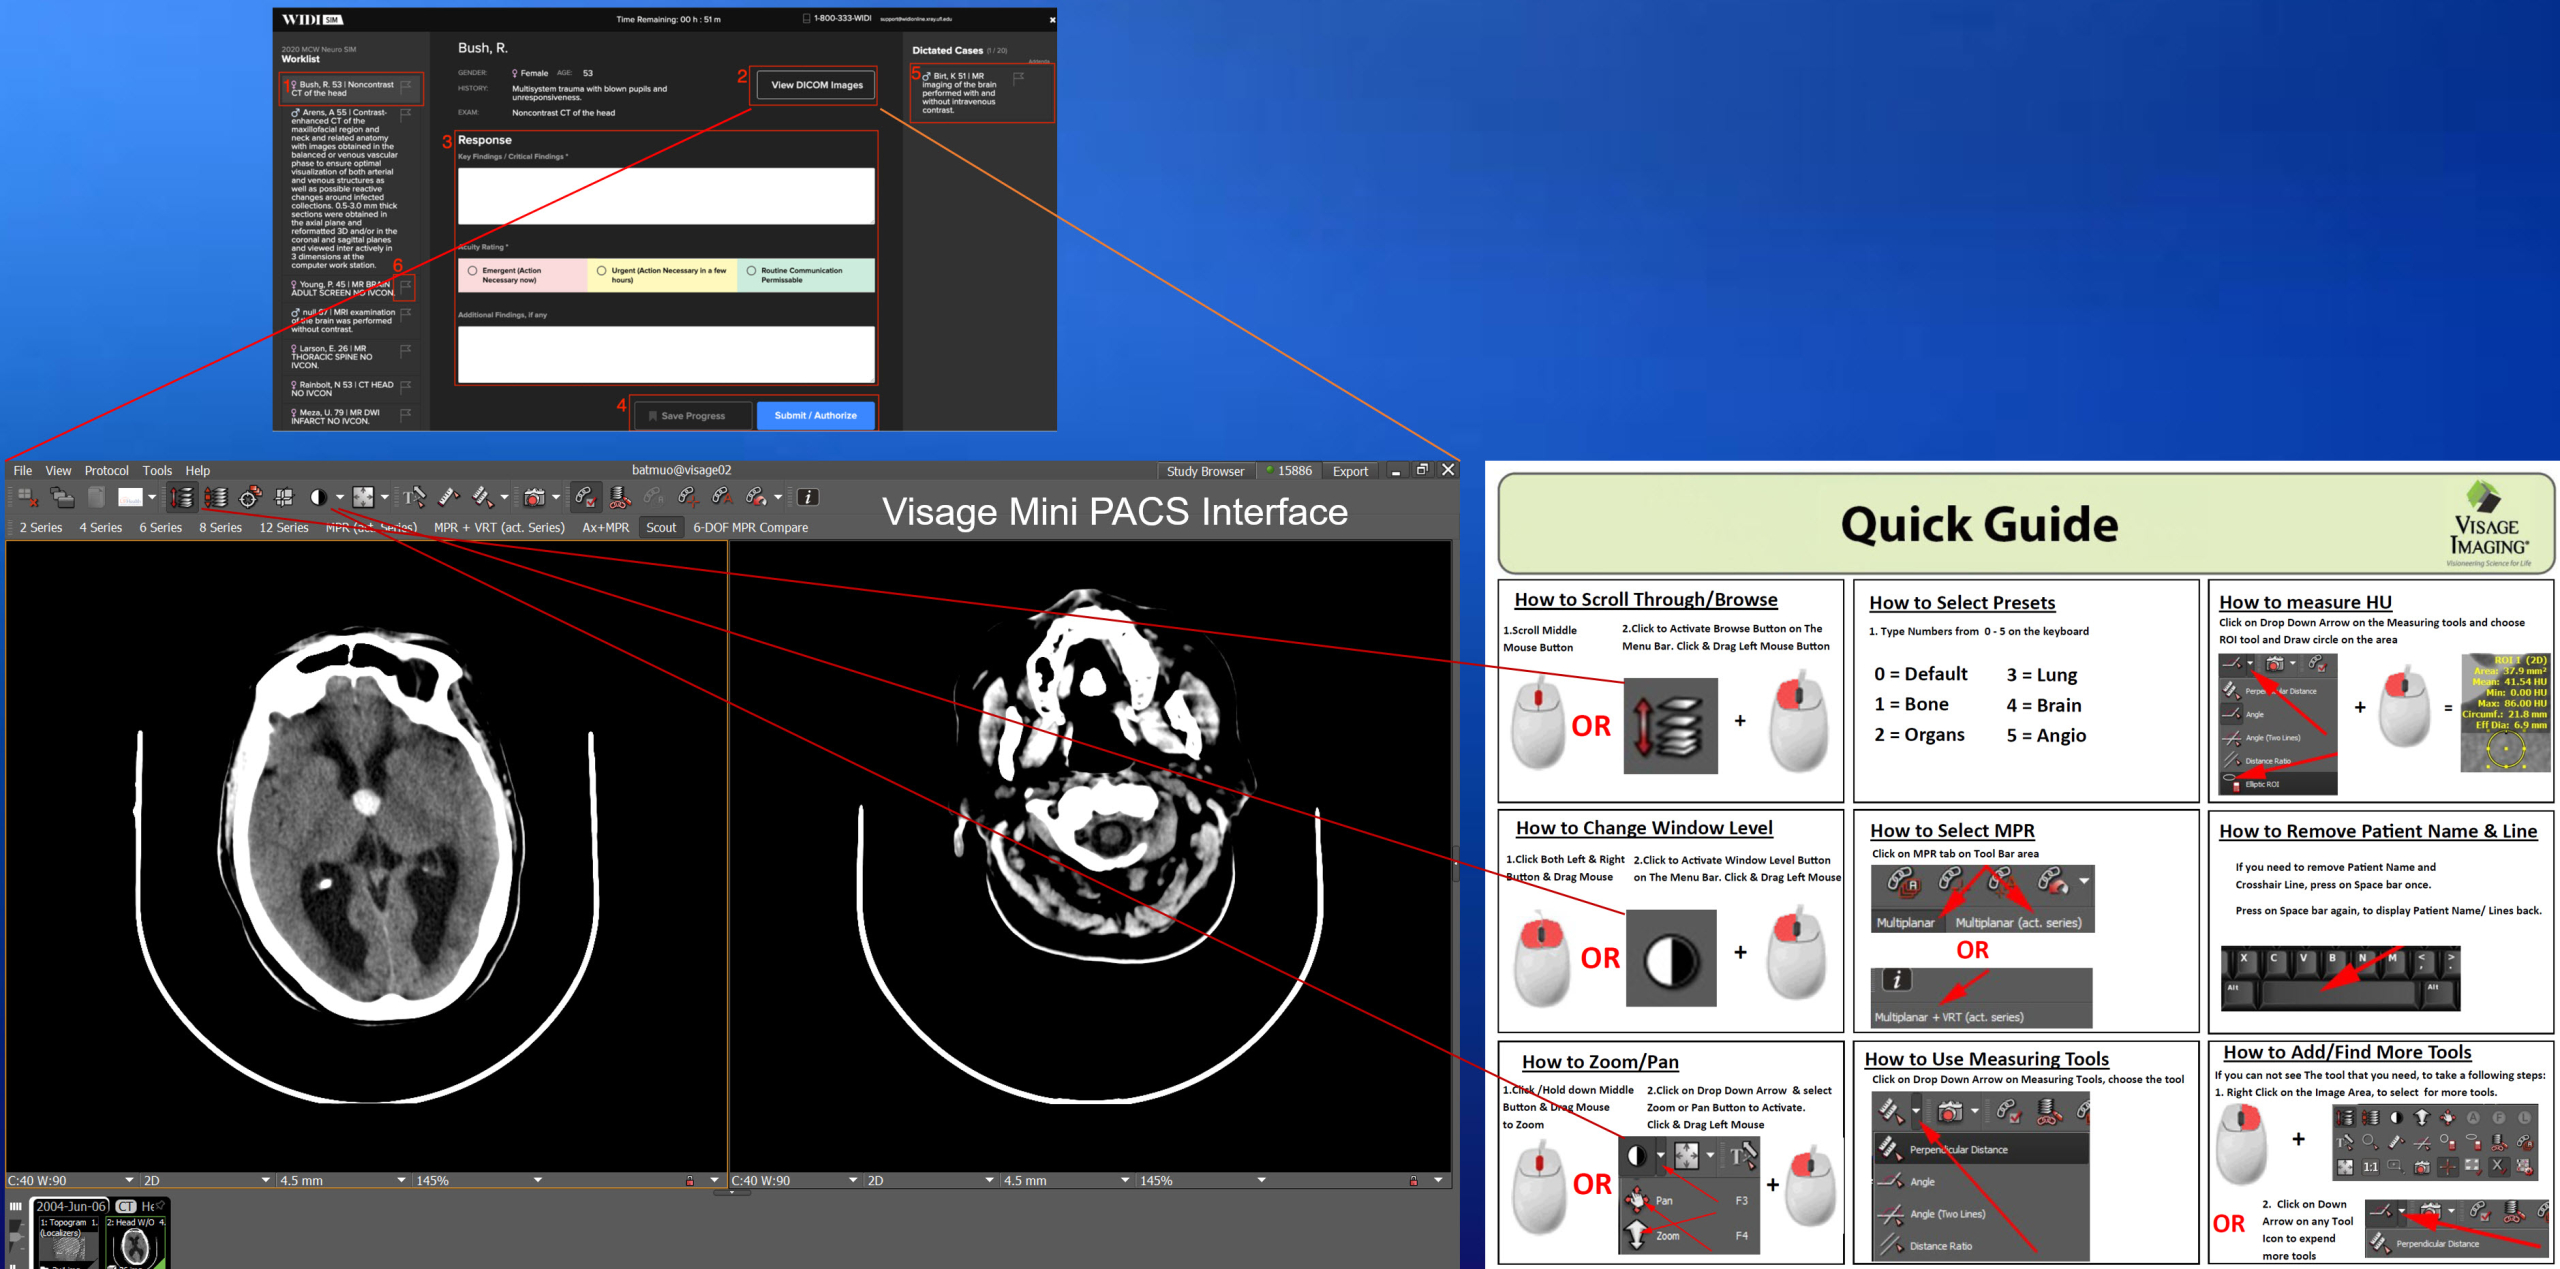
Visage Imaging viewer should be installed on your SIM workstation by your IT group before your System Check session. To open Visage Imaging viewer by clicking on the “View DICOM Images” button on the upper right corner of the reporting window.
We’ve emailed the Visage User interface Quick Guide to your Program Coordinator. Please print this guide out and keep at the SIM workstation. This quick guides gives you short cuts how to navigate the imaging viewer. Please keep in mind that image manipulation tools will be changed according to the particular imaging modalities such as CT, MR, Xray, etc.
Step 8: Visage Monitor Configuration
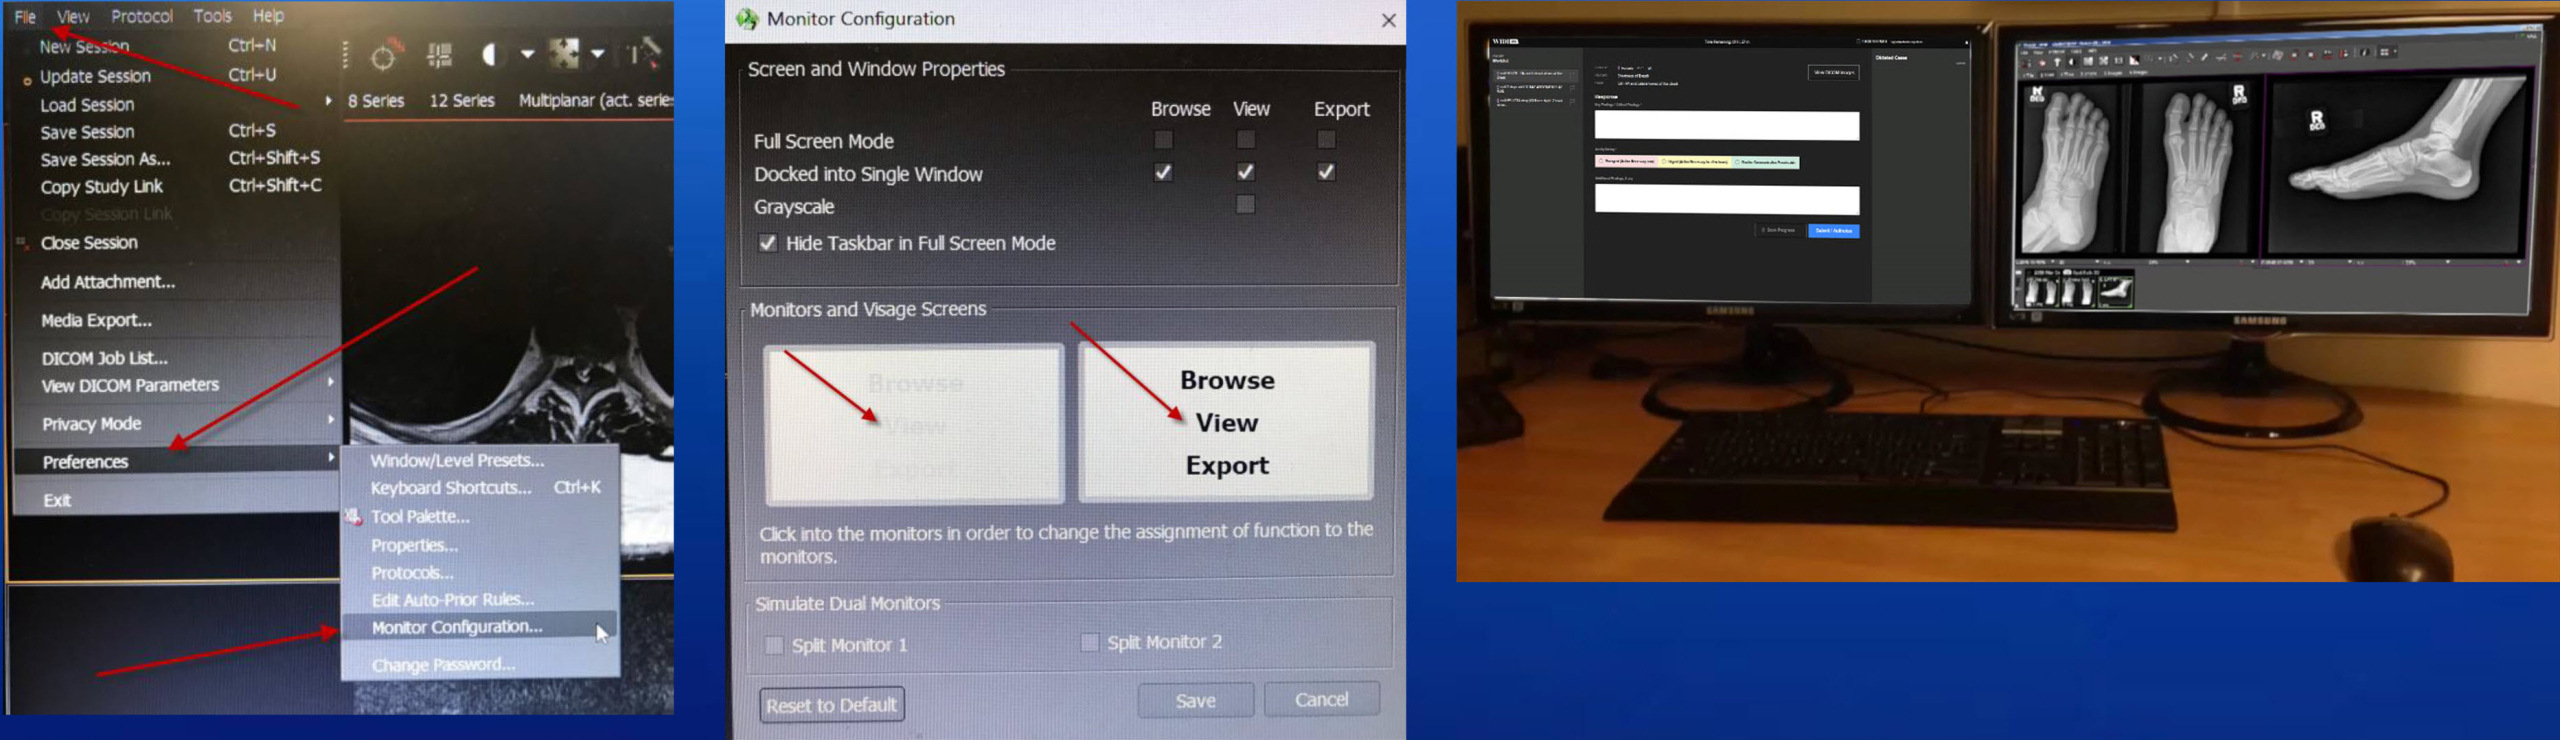
The Visage Image Viewer needs to be configure to fit on one monitor.
1. Click on File Drop Down Menu in the Visage
2. Choose Preferences
3. Choose Monitor Configuration
4. Activate 2nd View/Monitor and De-activate 1st View/Monitor
5. Save
6. Drag the Reporting Window to the 1st Monitor and Maximize it.
7. Drag the Image Visage Viewer to the 2nd Monitor to Maximize it.
Please note that each user needs to do the Visage Monitor Configuration on their login. We’ve emailed the PDF Instruction to the Program Coordinators as well.
Step 9: Ending the SIM Test

Throughout the SIM, pay attention to the time remaining clock. When time runs out, you will be automatically logged out of the system. We recommend that you spend no more than six minutes on each case, so manage your time wisely and try to end your SIM a few minutes before time expires.
Remember that you have 8.5 hours to complete the SIM, this includes any breaks you may wish to take. You are not allowed to pause or to stop the SIM.
Once you have submitted all your SIM responses, the blue “End SIM” button will appear in the (empty) worklist column. You must submit all your cases in order to see the “End SIM” button. If you have no further addenda, then you can select to end the SIM.
You will be returned to the SIM homepage, then click on the down arrow next to your name in the upper right and choose Logout.
Frequently Asked Questions
Q: Do I need to provide a recommendation for follow up for the SIM cases?
A: If appropriate for the case, please provide pertinent recommendations, such as “surgical consultation or follow-up imaging is recommended.”
Q: How long is the SIM?
A: The SIM is 8.5 hours, inclusive of any breaks you may wish to take.
Q: How many cases are included on the SIM?
A: There are 65 cases included on the SIM.
Q:. Can I pause or stop the SIM?
A: Once you’ve started the SIM, it will run continuously for 8.5 hours in duration.
Q: Can I take short breaks or a lunch break?
A: The number and length of any breaks you may wish to take is at your discretion. However, please note that time will not stop. You will only have 8.5 hours to complete the SIM, inclusive of any breaks you may wish to take.
Q: Can I access educational resources during the SIM?
A:. You are permitted to utilize educational resources that you would normally have access to in a typical reading room, including internet searches, STATdx, textbooks, etc. However, you are not permitted to seek assistance from others.
Q: How long should my response be?
A: Please be short and concise – make the call. Identify any critical and/or key findings, pertinent negatives, and recommendations for follow-up as appropriate. Remember normal studies are included on the SIM.
Q: Who grades the SIM?
A: Each SIM is hand-graded by a team of UF Radiology sub-specialists who utilize a robust grading rubric.
Q: How does the SIM grading system work?
A: A robust grading rubric has been incorporated into the SIM. Each case is allocated 10 points.
Q: Can I discuss my SIM results with you?
A. Please direct all questions regarding SIM results to your Program Director.
Q. Who should I contact if there are technical difficulties?
A. Please notify your program coordinator immediately if you experience any technical difficulties. The program coordinator should contact us for technical assistance.
Q. During the technical difficulties, I lost time – can additional time be added?
A. Additional time may be added for documented technical difficulties that are brought to our attention in a timely manner.