In advance of the SIM, please setup your workstation(s) as outlined below for your Residents. We recommend setting up and testing workstations at least a week in advance to allow time for troubleshooting, if necessary.
Operating System: We are only able to deliver the SIM using the Microsoft Windows operating system
Hardware (PC) Requirements:
`CPU: 1GHz Intel processor, or faster
Memory (RAM): 8GB
Monitors: Two 19” monitors w/ 1280 X 1024 (4:3) or 1440 X 900 (16:10) resolution. Please note that two monitors are required – one to display the data entry screen and one to display the image viewer. The SIM will not function properly if only one monitor is used.
Minimum Internet Connection Requirements: At least 20 megabits; Ensure your speed is appropriate via the Speedtest.
Browser Requirements: Download the latest production release of Mozilla Firefox or Google Chrome. Please note that the SIM does not run on Internet Explorer.
Allow Cookies: Ensure your Microsoft Windows operating system is set up to allow cookies.
Enable JavaScript: Enable JavaScript in Mozilla Firefox or enable JavaScript in Google Chrome.
Step 2: Download and Install the Image Viewer (Visage, Thin Client)
Choose Windows 64-bit, unless you have older 32-bit computer.
For programs already using Visage at their institution: Check the Visage version number that your institution is using.
However, we recommend to install/reinstall the latest version of the Visage Thin-Client. If your institution is using a different version number, please contact us for alternative options.
Note: All previous versions of Visage must be uninstalled, before installing the newest version of Visage.
Step 3: During the “Client Login” Process, Fill in the Server Name Only http://widi.cloud.visageimaging.com/
Login: WIDI User Name: is always your email address
And use the temporary password provided by us.
Note: in order to check complete SIM system functionality, your IT personnel needs full access to that designated SIM workstation.
We need their full name and email address that we can create an account for that person.
They will be linked to the System Check so that they can go through complete process as the resident would.
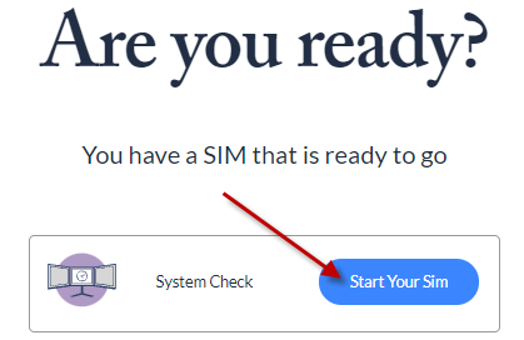
Step 6: Start the SIM
Once logged in, you will be asked to Start Your SIM.
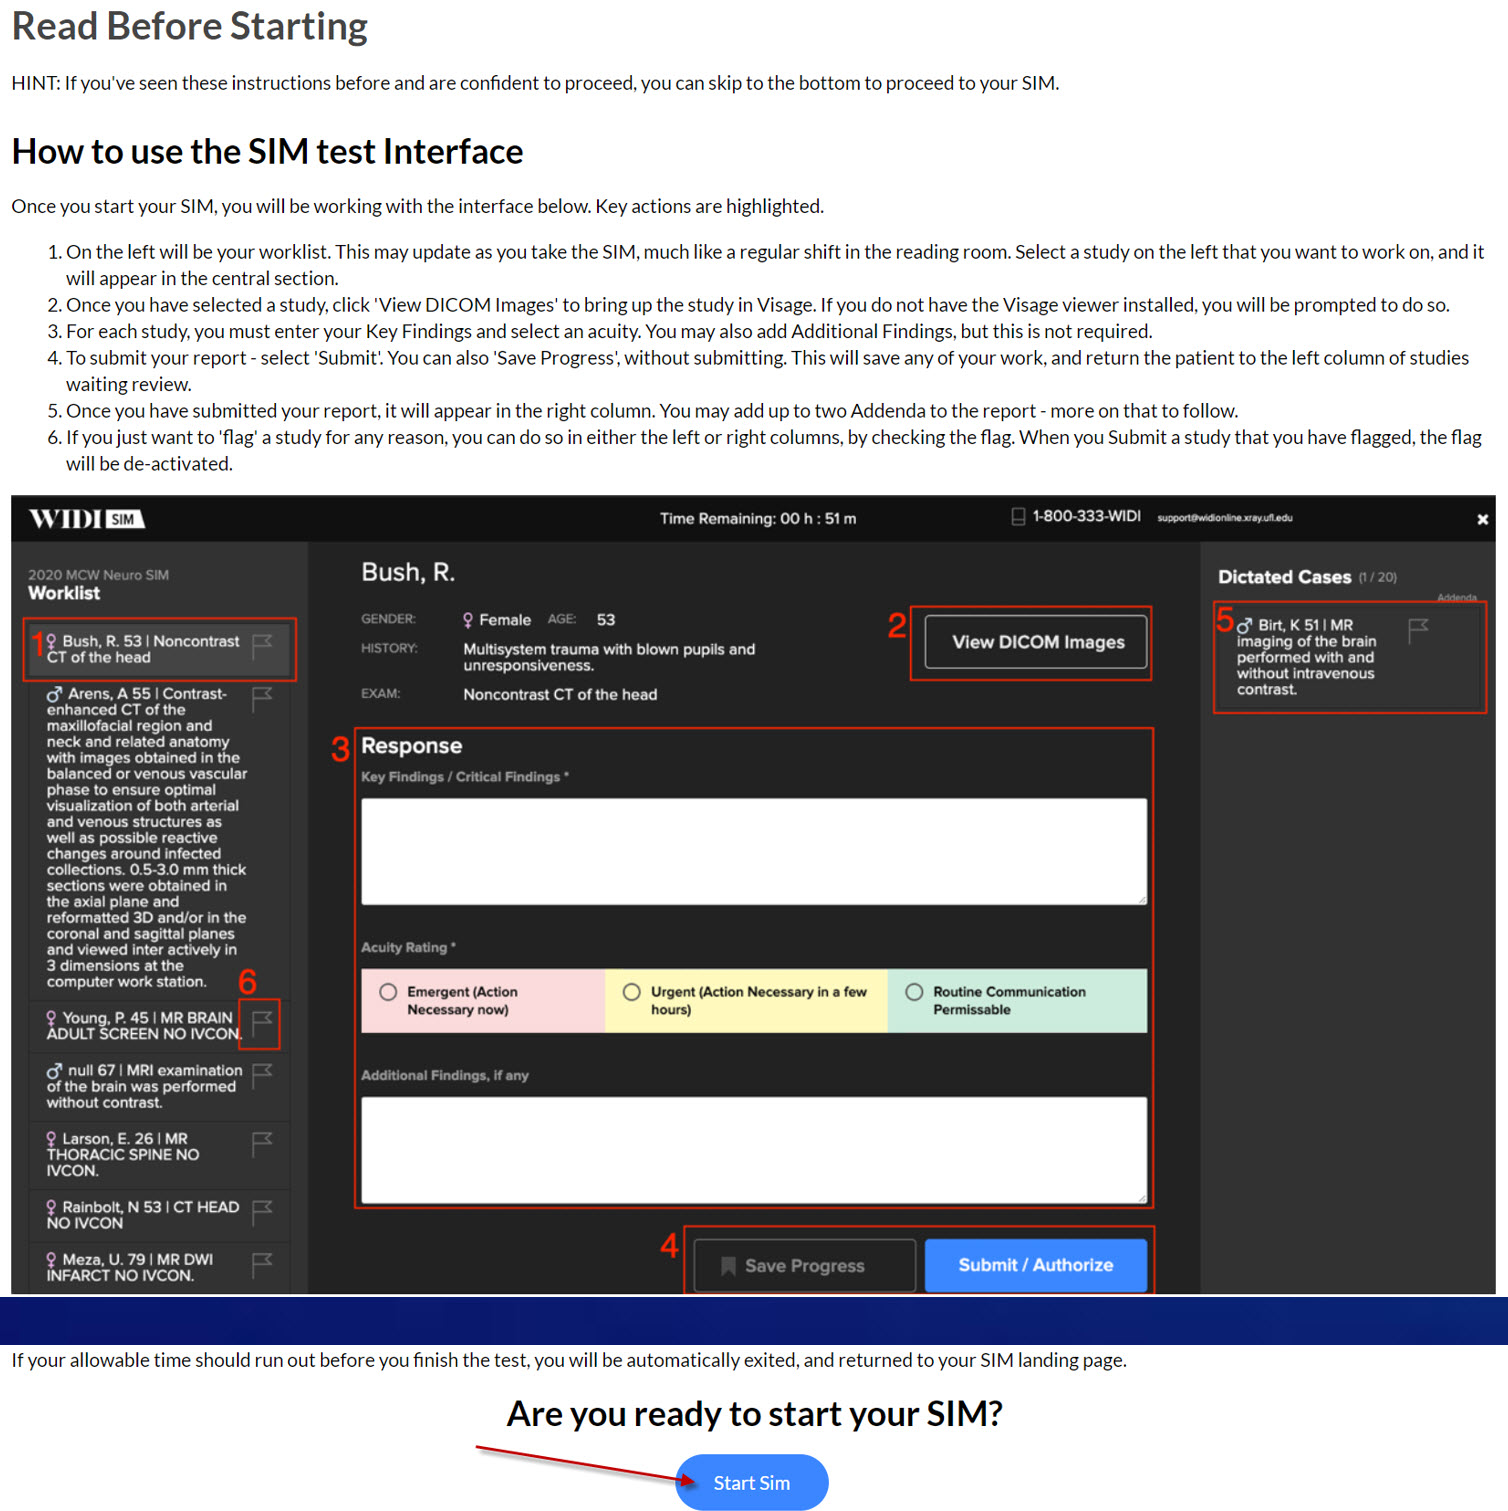
Step 7: SIM Instruction Pops Up
After clicking Start Your SIM button, SIM interface instructions will pop up. After scrolling down the Instruction page, the Start SIM button will appear at the bottom of the page.
Click on Start SIM blue button to take the SIM
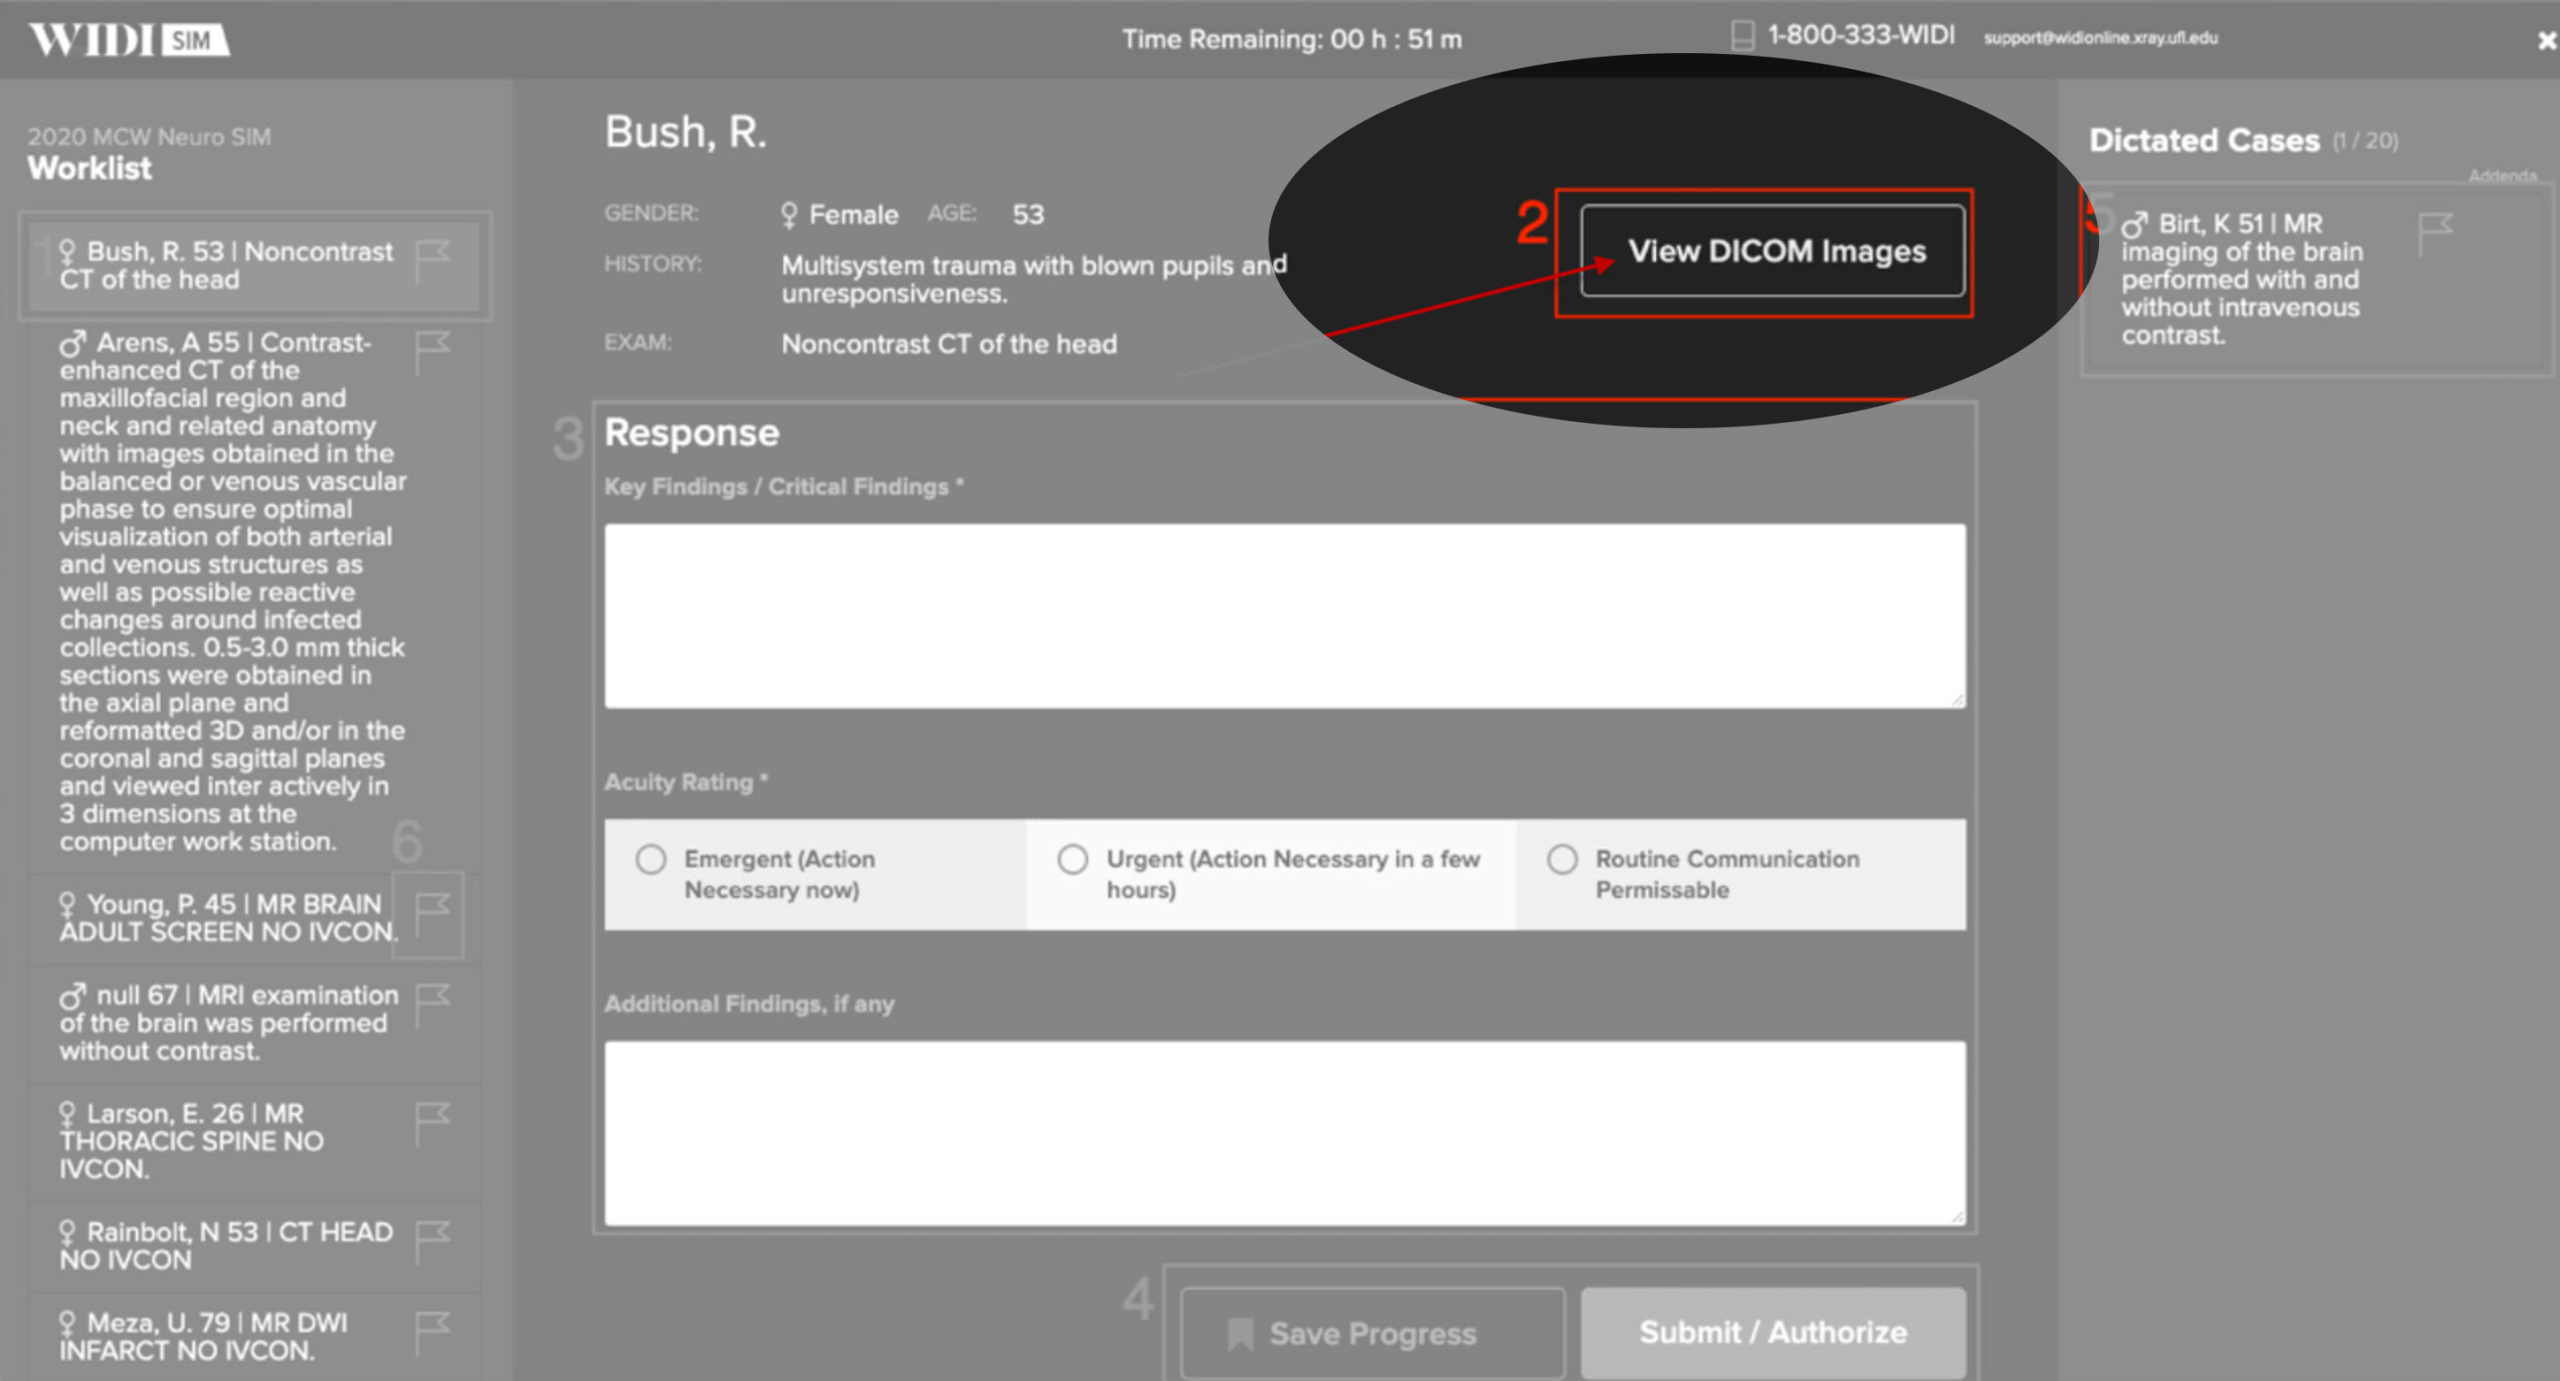
Step 8: Launch DICOM Viewer
Click “View DICOM Images” to launch the image viewer.
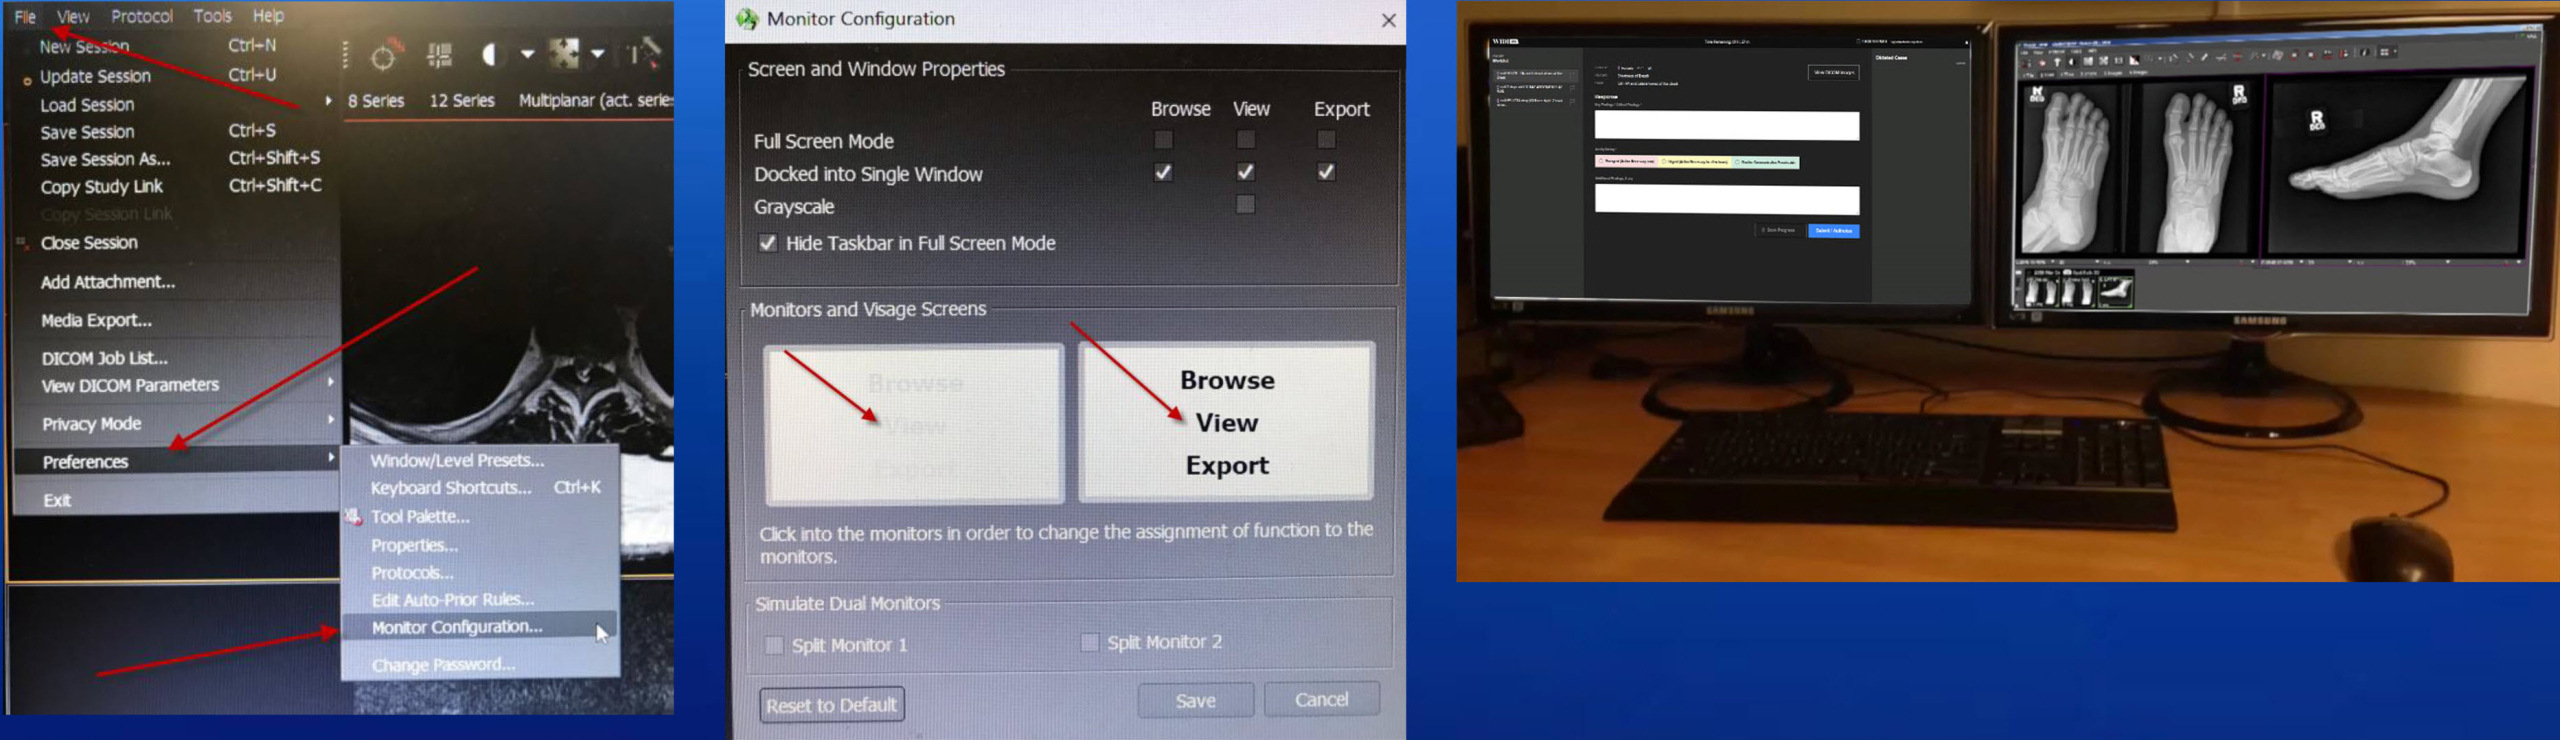
Step 9: DICOM Viewer
DICOM Viewer Supposed to Look like this: System Check Case 1 DICOM.
The Visage Image Viewer needs to be configure to fit on one monitor.
1. Click on File Drop Down Menu in the Visage 2. Choose Preferences 3. Choose Monitor Configuration 4. Activate 2nd View/Monitor and De-activate 1st View/Monitor 5. Save 6. Drag the Reporting Window to the 1st Monitor and Maximize it. 7. Drag the Image Visage Viewer to the 2nd Monitor to Maximize it.
Please note that each user needs to do the Visage Monitor Configuration on their login. We’ve emailed the PDF Instruction to the Program Coordinators as well.


